Developing with Cassandra on Windows
If you're like me and currently do most of your development work on a Windows machine, the first thing you'll need to do when you want to build an application on Cassandra is figure out how to install it on said machine. When I started working on KillrVideo, this was one of the first things I did. Fortunately, this is a lot easier than it was just a few years ago.
The first thing to do is to jump over to the Planet Cassandra downloads page. Here you'll find a list of DataStax Community Edition downloads organized by Cassandra version and operating system.

DataStax Community Edition is really just the open source version of Apache Cassandra bundled with the DataStax OpsCenter tool for managing and monitoring a cluster. You'll want to grab the appropriate MSI installer for your version of Windows (32-bit or 64-bit).
You'll also find a link to download DataStax Enterprise on the page. If you're interested in easy integration with things like Spark, Solr, and Hadoop, you might want to take a look at using DSE. Unfortunately, DSE does not currently support installation on Windows machines, so if you want to prototype against DSE, you're going to have to create a Linux VM and install DSE there (a topic for another blog post).
Install Cassandra on Windows
Once you've downloaded the appropriate MSI from Planet Cassandra, run it to launch the setup wizard.
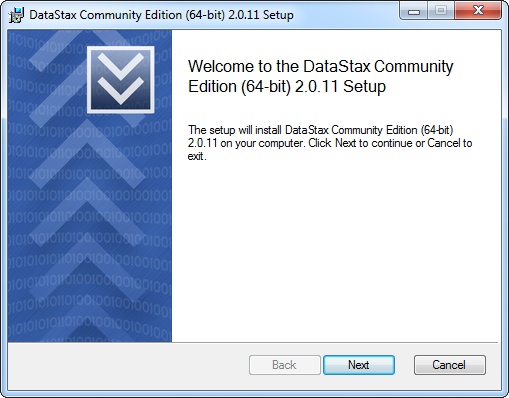
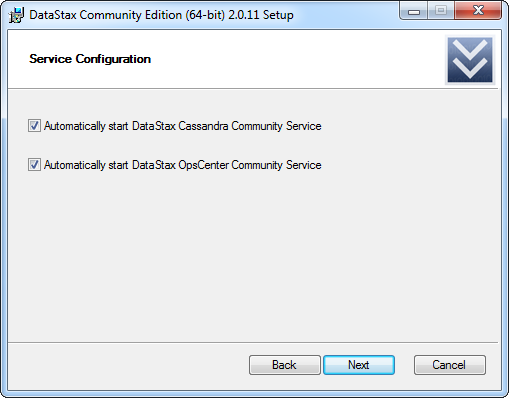
Follow the prompts in the setup wizard. By default, the installer will put the Community Edition under C:\Program
Files\DataStax Community. Be sure that you leave the boxes checked when asked about automatically starting services.
When the wizard has completed the installation, hit Finish to exit the installer. The installer will add three Windows
services to the system. You can verify this using the Services snap-in control panel (in Windows 7, do Start, Run...,
services.msc).
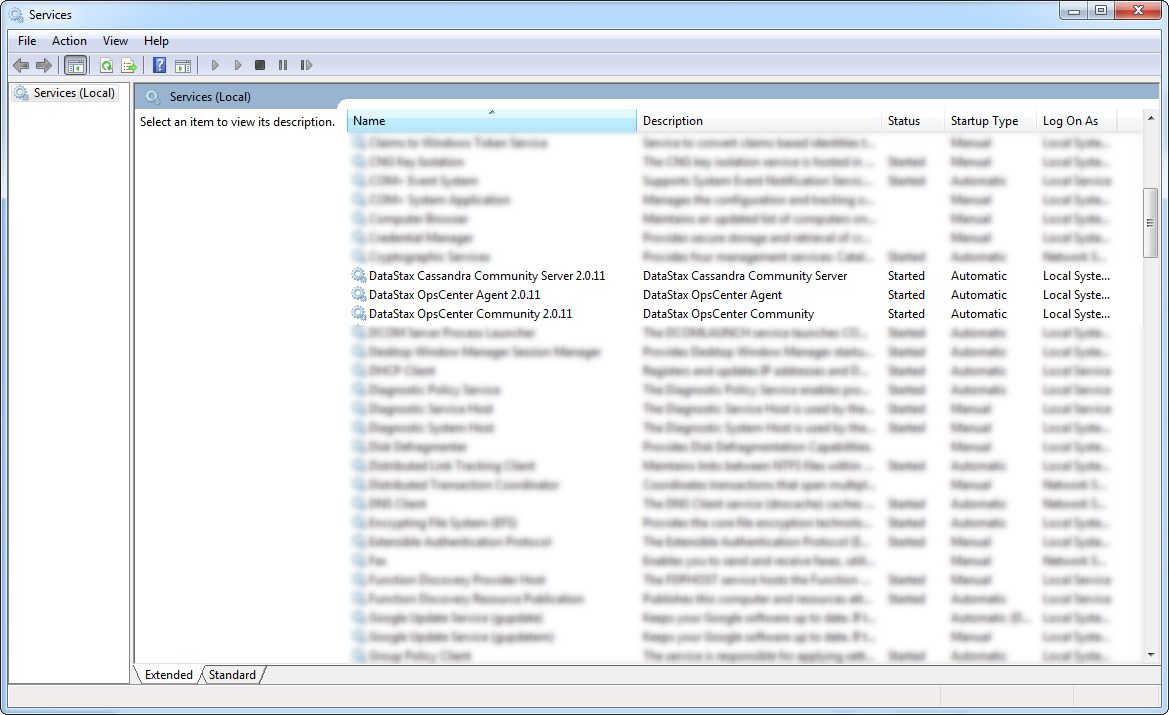
The three services installed are:
- DataStax Cassandra Community Server: this is the Cassandra database itself.
- DataStax OpsCenter Agent: the agent for OpsCenter that collects health/statistics information on your cluster and reports them back to OpsCenter.
- DataStax OpsCenter Community: the OpsCenter program. Collects information from the agents and provides the web UI you can use to view health information and manage your cluster.
Optional Configuration
At this point, you should have a running Cassandra cluster (with a single node) on your machine with no further
configuration needed. If you're interested in digging into some of the configuration options available to you with
Cassandra though, you'll want to have a look at the cassandra.yaml file. If you used the default installation
location during the setup wizard, you can find this file under:
C:\Program Files\DataStax Community\apache-cassandra\conf\cassandra.yamlThis file has a ton of configuration options and is pretty well documented in the comments. One change that I like to
make is the location on disk where Cassandra persists data. By default, the installer will configure your
cassandra.yaml file to place all these files in subdirectories under:
C:\Program Files\DataStax Community\dataI like to move these over to a directory I create on my D drive. The relevant keys in the YAML file for changing this
configuration are:
data_file_directories: the directories where Cassandra stores your SSTable data.commitlog_directory: the directory where the Cassandra commit log is stored.saved_caches_directory: the directory where Cassandra saves caches (like the Key Cache).
If you decide to make this change, here are the steps I usually follow:
- Start by stopping the DataStax Windows services mentioned above (you can do this from the Services control panel by right-clicking on each service).
- Update the configuration in the YAML file to point to the new location you've created (I usually leave the
subdirectory names like
saved_cachesandcommitlogintact and just change the root). Be sure to save your changes. - With the services stopped, you should then be able to move all the data files from their old location to the new one (just cut and paste in Windows Explorer).
- Last, start the Windows services back up (again, you can do this from the Services control panel by right-clicking on each service).
Any time you make any changes to the
cassandra.yamlfile, you should restart the Community Server service to make sure the changes take effect.
Tools and Utilities Provided
There are a couple of tools that come installed out of the box with Cassandra that you should become familiar with. While I'm only going to mention two, there are a number of others available as well. All of these are installed on Windows by default under:
C:\Program Files\DataStax Community\apache-cassandra\binCQL Shell
CQL Shell, or as it's more commonly abbreviated cqlsh is a REPL for running commands and CQL statements interactively
against a Cassandra cluster. When you install Cassandra on Windows with the installer, you'll automatically get a Start
Menu link (under the DataStax Community Edition folder) to launch it. You can also launch it from the command line
using cqlsh.bat from the Cassandra bin directory mentioned above. Try using the -h or --help flag if launching
from the command line to see all of the options available.
By default (and when launching from the Windows Start Menu), cqlsh will connect to your Cassandra node on localhost.
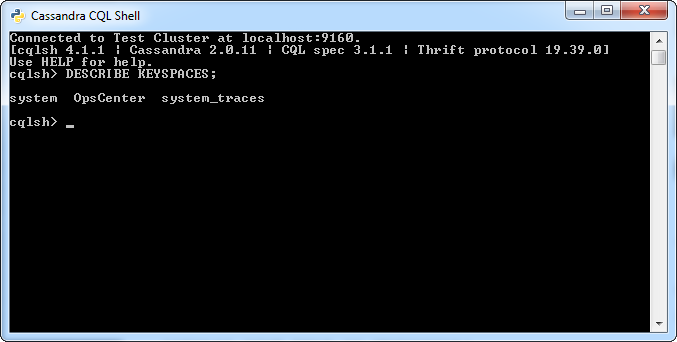
You can use CQL Shell to check that your newly installed Cassandra cluster is running properly. For example, we could
run the DESCRIBE KEYSPACES command to list the Keyspaces currently available in our cluster.
Check out the CQL documentation on DataStax web site for more details on CQL and using CQL Shell.
NodeTool
NodeTool is the swiss army knife of tools for Cassandra. It's got a ton of commands for managing your cluster. You
can find it under the Cassandra bin directory mentioned above. NodeTool is a command line only tool and you won't
find a Start Menu link for launching it. Try running nodetool.bat without any arguments to see the list of commands
available to you.
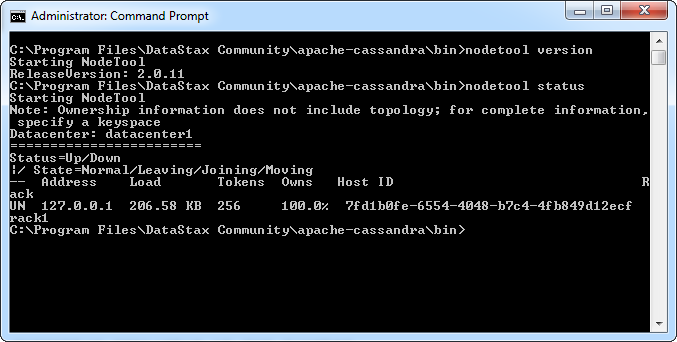
Here's an example of using it to check the Cassandra version of my local node, and then the status of the cluster.
Check out the nodetool documentation on the DataStax web site for more details on what you can do with nodetool.
DevCenter, Download It
One tool that doesn't come out of the box that can be really nice to have is the completely free
DevCenter tool from DataStax. DevCenter provides a
GUI for interacting with and exploring your Cassandra cluster. You can grab a copy for Windows from the DataStax
Downloads page. It currently doesn't offer a Windows installer, so just
unzip the archive you've downloaded and then run the DevCenter.exe executable from Windows.
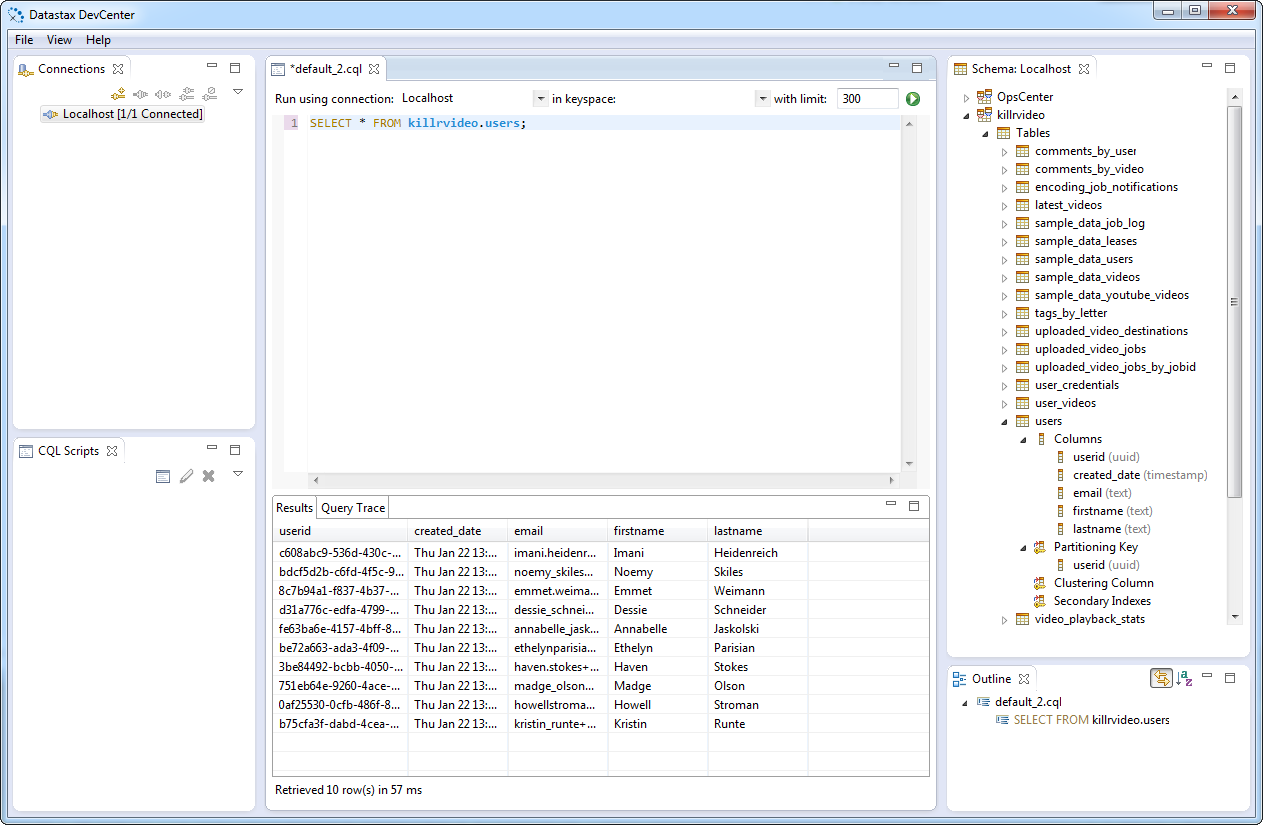
Here's what it looks like exploring/querying the data from the KillrVideo app from inside DevCenter.
The Future of Cassandra on Windows
Getting Cassandra running on Windows is a pretty straightforward task these days, but what about production deployments? The current reality (as of Cassandra 2.1) is that while Windows support is pretty robust and totally fine to do development and prototyping with, it's definitely still in "beta". In fact, Jonathan Ellis talked about this briefly in his recent keynote address at Cassandra Summit Europe 2014.
If you're feeling adventurous and using Cassandra 2.1 or higher, deploying in production on Windows is certainly an option. (And be sure to file bug reports for any issues you encounter). If you're a little more risk-averse though (or want to ensure you get the best performance possible from Cassandra), you'll probably want to stick with doing production deployments on Linux, at least until Cassandra 3.0 rolls out where we'll hopefully have close to performance parity.
Further Reading
The DataStax Dev Blog always has great content for Cassandra developers and users. A couple of recent blog posts might be of interest to Windows users:
- Cassandra and Windows: Past, Present, and Future by Josh McKenzie is a great writeup of some of the challenges of getting Cassandra performance parity under Windows. If you're interested in why Cassandra performance in Windows has historically lagged Linux, take a look.
- CCM 2.0 and Windows by Kishan Karunaratne is a great rundown of using the Cassandra Cluster Manager tool for running a cluster of Cassandra nodes on your local Windows machine. If you're in a more advanced testing scenario locally and you need a cluster of nodes instead of the single node that DataStax Community Edition provides, this will get you started.